KPB’S BASEBALL CAKE TUTORIAL | Cake for special occasion (EP269)

Go for the Big Game!
Today, I want to share with you my Baseball cake Tutorial.
Some of you may already know, I am a baseball mom, and my son recently graduated from senior-high-school; and he is entering college, and he continues playing baseball.
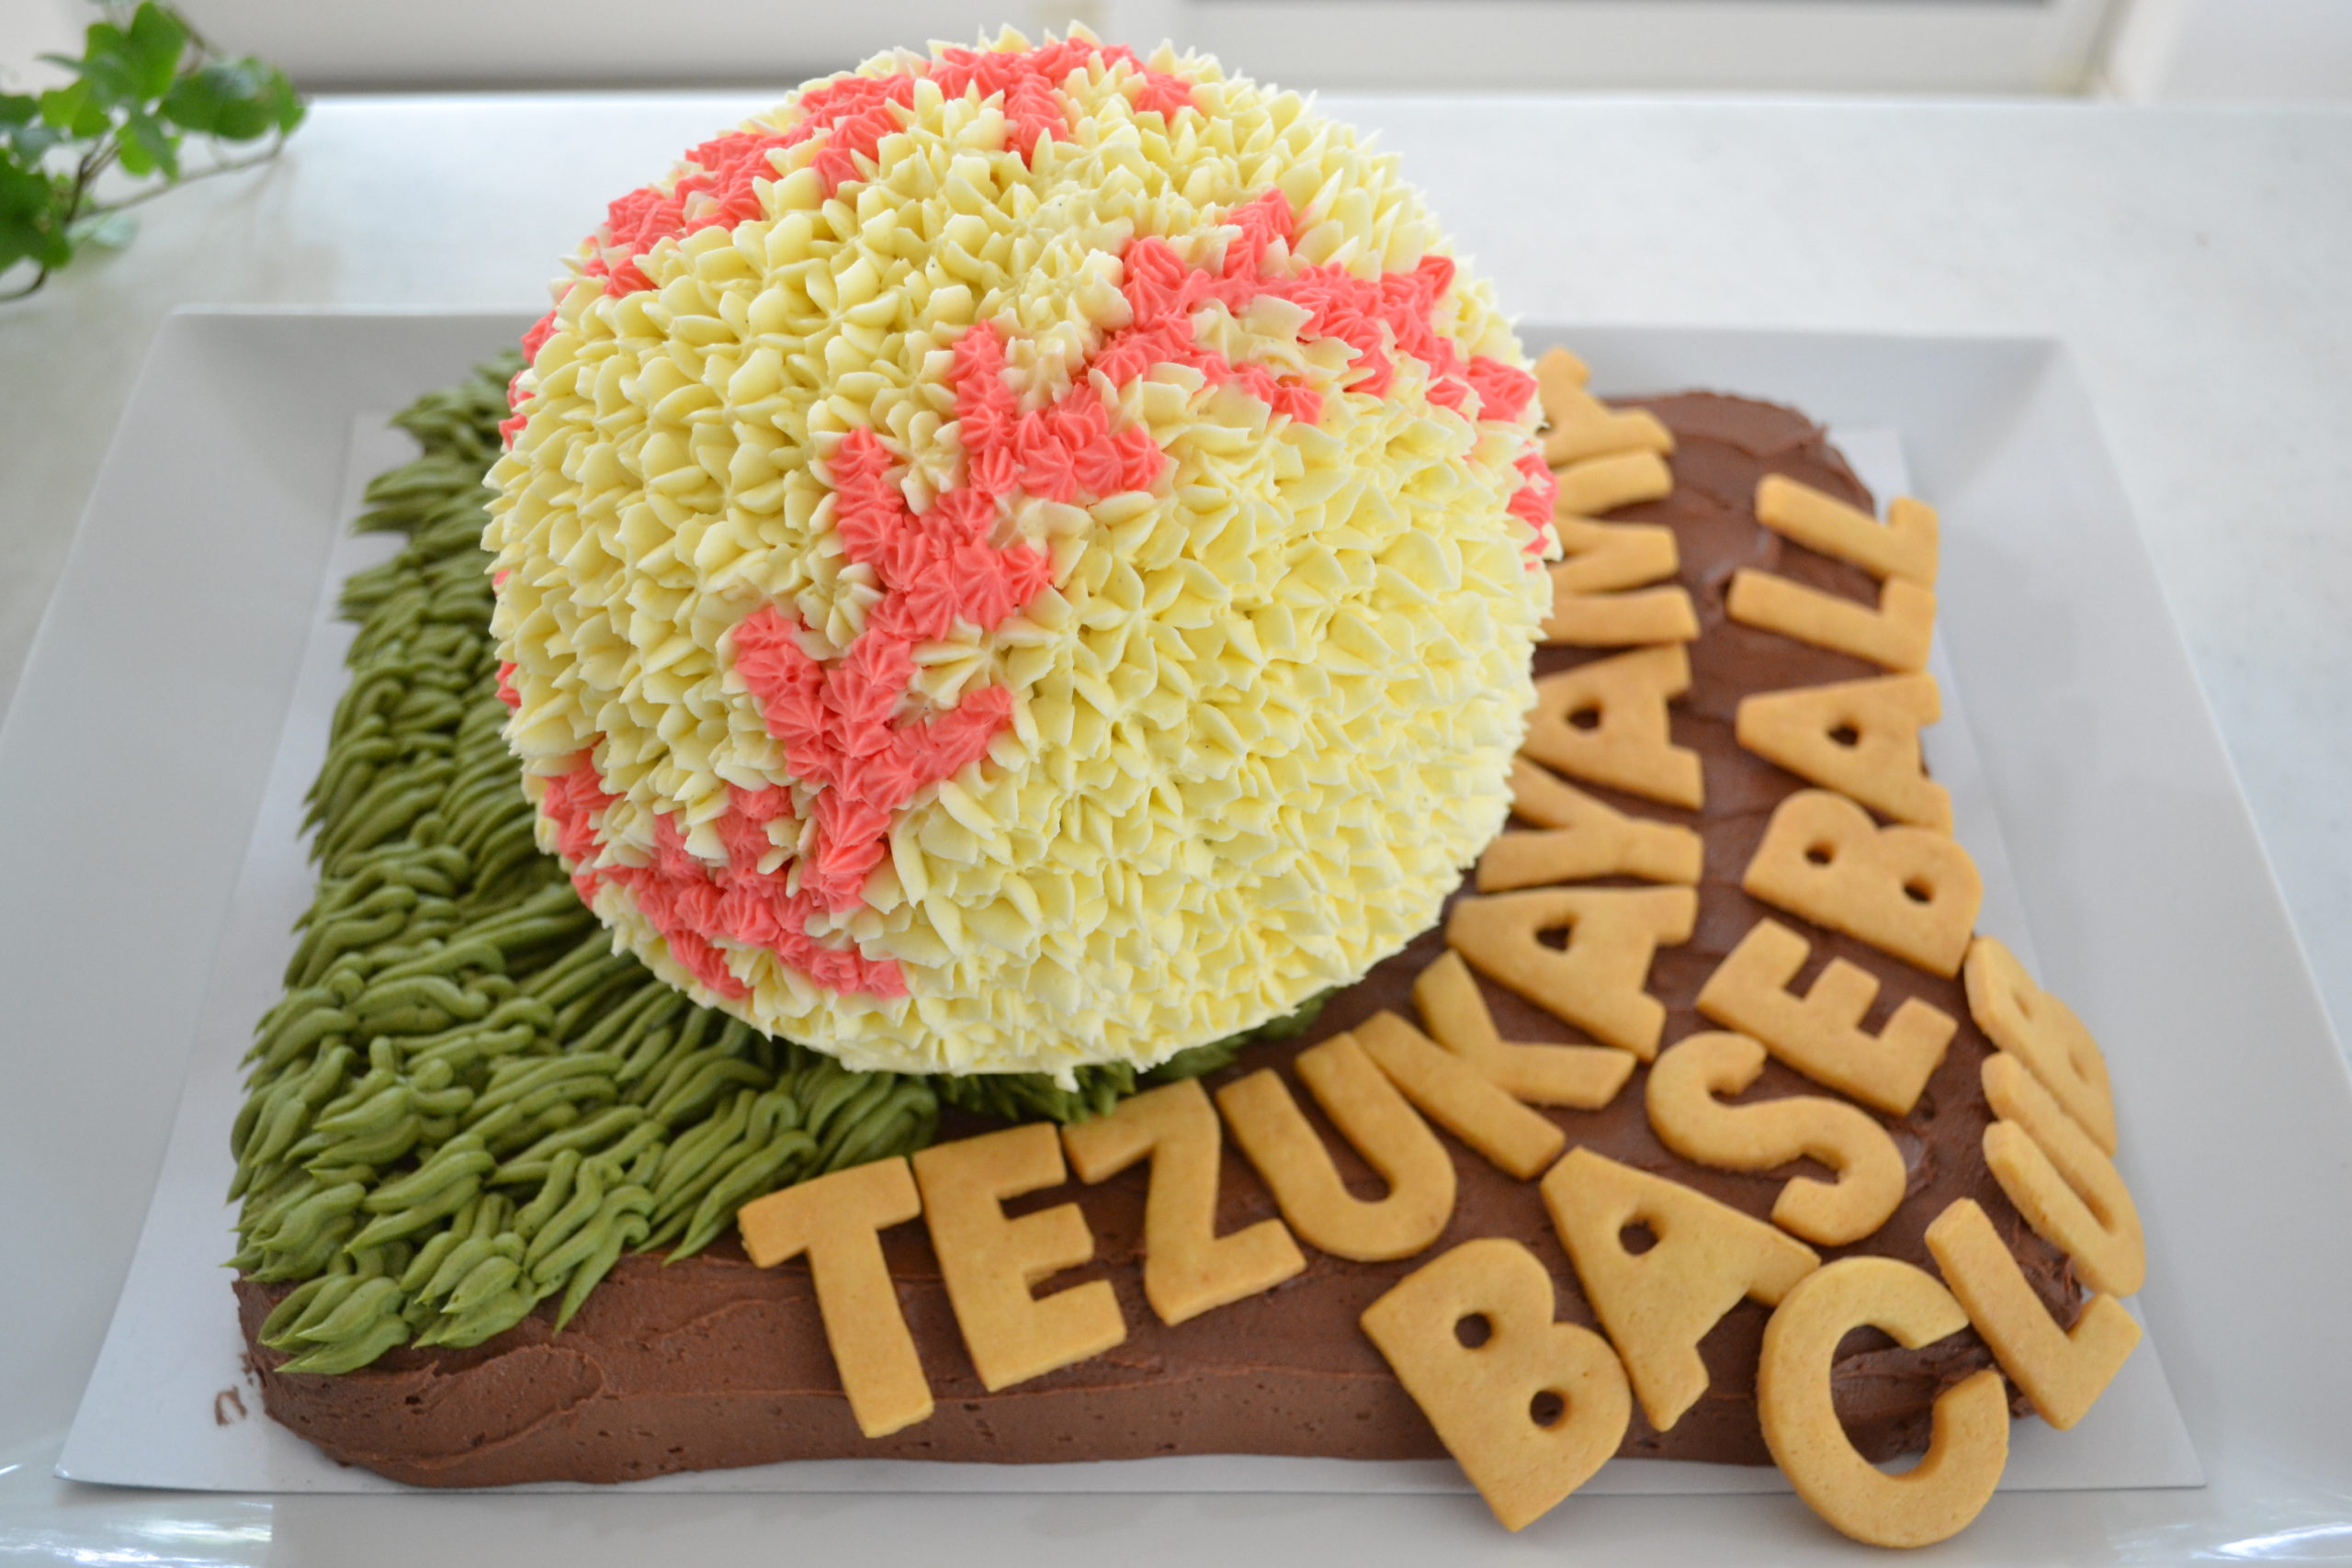
This was the cake for the kicking-off party for the big game.
I just want to share my motherhood memories, so sorry for my self-satisfaction video. Lol.
This is a huge cake to entertain thirty to forty people, so it might not be needed for many of you, people who don’t have an opportunity to make a big cake, but you can downsize it and make it into your own show-stopping cake.
My son’s last season in senior-high-school was suddenly over because of the pandemic.
I hope his college baseball going successful as well as working on the study!
The American Cake
Basically this cake consists of Devil’s food cake with less sugar content of original, and chocolate buttercream, Matcha butter cream and cream cheese frosting.
The most dense and rich cake of all in my baking.
It’s very different from the cake eaten in Japan.
Almost all of the Japanese cake is consists of genoise and whipped heavy cream. Japanese people love fluffy and soft cake.
When I tried the American cake for the first time, I was so impressed by its richness. Since then, I started researching on the American baking.
One thing that I change on each recipe is reducing the amount of the sugar. I have my own ratio of sugar, so I adjust to it.
If you like one of my cake recipe, you will be satisfied with the taste.

Base Ball Cake
Equipment
- 3D sport ball cake pan, 20×25cm sheet cake pan (or baking tray), bowl, spatula, whisk, stand mixer, oven
Ingredients
Cake batter
- 540 g unsalted butter
- 540 g light brown sugar
- 8 large eggs
- 300 g semi-sweet chocolate
- 480 g all-purpose flour
- 1 tsp baking powder
- 1 tsp baking soda
Chocolate Butter Cream
- 300 g unsalted butter
- 225 g powdered sugar
- 30 g cocoa powder
- 240 g milk chocolate
- 1 tsp Vanilla paste or essence
cream cheese frosting
- 375 g cream cheese
- 375 g powdered sugar
- 1~2 tbsp heavy cream
- 1~2 Vanilla paste or essence
Vanilla butter cream
- 400 g unsalted butter
- 300 g powdered sugar
- ⅓+ red food color
- ⅔+ 5g Matcha powder
Instructions
Cake batter
- First, let’s start with softening the butter.Put the bowl on the stovetop directly, and heat it up just until it melted the outside.It's going to take several seconds. When it starts melting, use your spatula to soften.Transfer to a stand mixer bowl and whisk until smooth and creamy.
- Add in light brown sugar and whisk until it looks fluffy and pale in color.Then add in room temperature egg one at a time.Eggs should not be cold. If cold, warm it up in a warm bath.
- And then add the melted warm milk chocolate.Here comes the temperature issue again.The chocolate should be warm because the chocolate set at 27 to 28°C.About 40°C melted chocolate is appropriate here.And then whisk until even.The cake batter the temperature should be at room temperature when you finish mixing.
- Whisk all-purpose flour and baking soda and baking powder, well.Whisk until the color looks even, and then add 1/3 of all-purpose flour mixed with the baking soda and baking powder.Then add in half the amount of the milk.And, the milk also should be at room temperature.Add in 1/3 of the flour mixture to just combine and alternating with the milk and finish mixing with the flour.The goal here is a little bit sticky cake batter, because we are making a huge size cake and it should not be cracked and holds its shape.So I need to develop gluten just a little bit that oppose the nomal procedure.
- Fill the prepared mold up to 70 %, and bake at 180°C for about 25 minutes for the sheet cake and 30 to 35 minutes for the ball cake.Or toothpick insert in the very center comes out clean, it's OK.
- Take out from the mold and cool it down on the wire rack.
chocolate buttercream
- Soften unsalted butter.Transfer to stand mixer bowl and whisk until very creamy and smooth.
- Add in powdered sugar and whisk until light and creamy and pale in color.And then add in shifted cocoa powder and mix until just combined.
- Add in warm melted chocolate and whisk to make a smooth buttercream.The temperature should not higher than 40℃; otherwise, it's going to be too fluid and not easy to apply on the cake.
- The chocolate buttercream goes into the piping bag fitted with thecake icing flat tip.
Cover the base cake with chocolate butter cream
- Because the chocolate would set quickly, I like to use it while the buttercream is soft and easy to work with, so let’s finish the base cake first.
- Pipe the chocolate buttercream all over the surface of the sheet cake and using a palette knife to smooth out the surface.
cream cheese frosting
- Shift powdered sugar to remove the lump.Put cream cheese into a stand mixer bowl and whisk until smooth.Add in powdered sugar little by little and mix until incorporated.
- Add in a vanilla paste to put some aroma.Add a little bit of heavy cream to adjust the consistency to easy to pipe out.
- Transfer to a bag fitted with a bigger star tip.
vanilla buttercream
- Soften the butter until smooth and add the powdered sugar.Whisk well until well combined and fluffy.
- I am making two of colored butter creams, devide the cream into 1/3 and 2/3.〈Pink butter cream〉 Add red food coloring for 1/3 of the buttercream.Pink color goes into a piping bag fitted with the small star tip.〈Matcha butter cream〉Add in Matcha powder for 2/3 of the butter cream.And for that matcha buttercream, transferred to a piping bag fitted with the multi-opening tip.
Assemble
- With a serrated knife, Slice the uneven top from the ball cakes.And slice a small piece of cake of round side, so that the cake stable when you are assembling.
- Place the cake on the cake-turntable, pipe out the cream cheese frosting.Place it on top of that chocolate cake.Place the other half of the bowl cake on the turntable, pipe out the cream cheese frosting and smooth the surface.Put it right on top of the bottom half. And push gently to stick together.
- Stick in the Chopsticks to stabilize and mark the level. I am using a food pen, but any pen is OK if it doesn't touch the cake.Take out the chopstick and cut off the excess, and push it back into the cake to stabilize.
- Put the whole cake on the turntable and cover the surface.This is called a crumb coat. It doesn’t have to be perfect but should be all covered.
- When all the surface is covered, now let’s mark the seam line with a wooden skewer.Pipe out the pink butter cream along the line.And then with the cream cheese frosting pipe out all over the surface.
- Pipe out the Matcha butter cream to make grass on the baseball field.※If you don’t have multi opening tip, you can use just tiny round tip or just apply with the back of the spoon.
- For the final touch, put the cookies of the name of the baseball team.
