How to make Melon Pan

Today, I’m going to be making, Japanese Melon pan.
Melon pan is very popular Japanese traditional sweet bread.
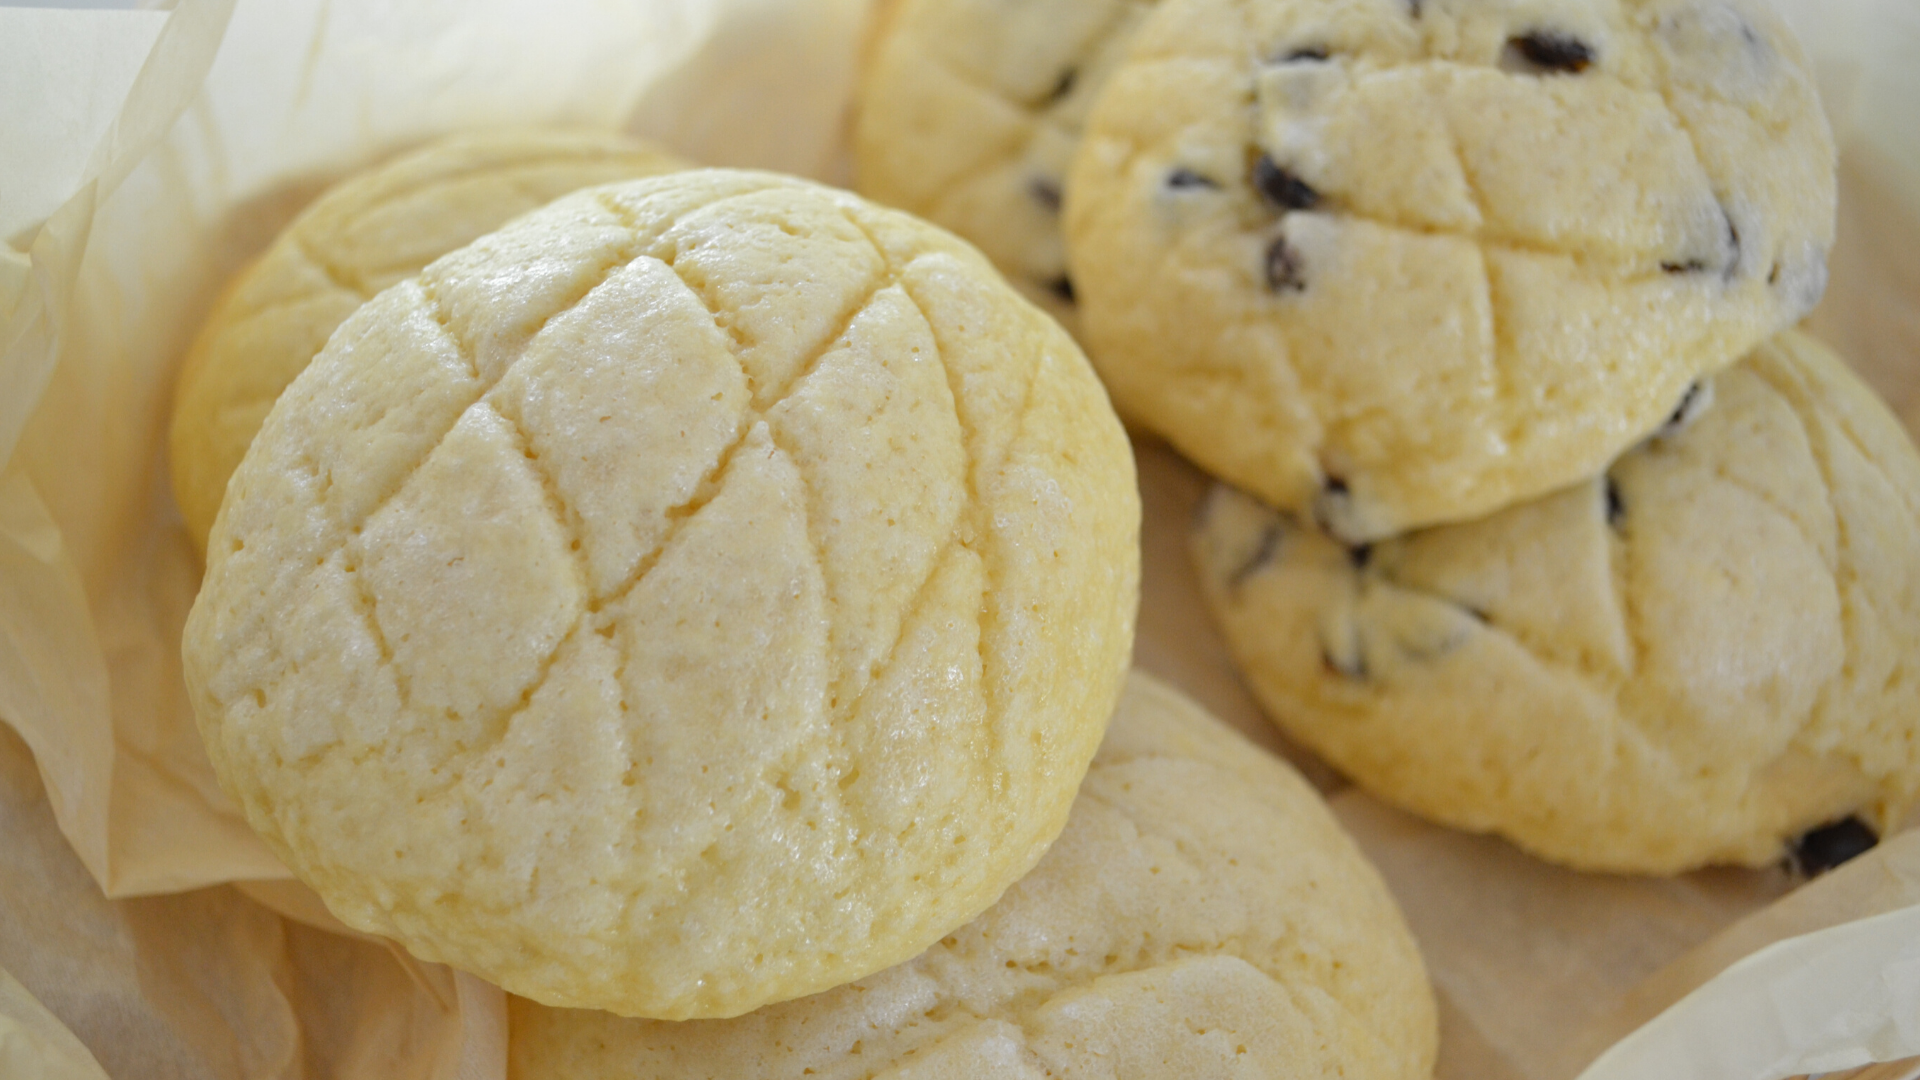
The light texture cookie dough is on top of fluffy milk bread.
The edges of the cookie crust is so crispy and make this bread so special.
Actually, Melon pan has nothing to do with Melon.
The criss-cross pattern on the surface looks like a melon.
Just like that.
In Kansai include Osaka, sometimes it is called “Sunrise”.
Because they don’t give it a criss-cross pattern and it looks like the sun!
If you have ever come to Japan, you would realize how much we love bread.
There are so many of fancy bakeries everywhere!
This is my first Japanese bread making a video, I don’t know why it took so long. I’ve been teaching baking for more than 15 years.
Anyways, I hope my experience will help your bread making!

Melon Pan
Equipment
- oven, bowl, stand mixer
Ingredients
Bread dough
- 200 g bread flour
- 50 g cake flour
- 30 g sugar
- 4 g salt
- 4 g active dry yeast
- 80 ml whole milk (room temp.)
- 80 ml water (lukewarm)
- 20 g beaten egg ※Save the rest for cookie dough
- 50 g unsalted butter
Cookies Crust
- 25 g unsalted butter
- 60 g sugar
- 40 g egg ※the rest of the bread dough
- 2 ts Rum or vanilla essence
- 120 g cake flour
- chocolate chip (optional)
Instructions
Bread dough
- 〈knead by hand〉Whisk dry ingredients in a large bowl.Mix wet ingredients except butter.Add wet to dry, mix to just combine.Cover with a piece of plastic and set aside for 10 mins. While resting the dough, it becomes easier to knead.After 10 mins, take out the dough onto your working surface.How to knead:Spread the dough and put together. This step develop the gluten faster. Continue doing this process for 5 mins.When you stretch the dough, if it stretches very thin, it's OK to proceed. 〈stand mixer〉put all the dry ingredients into a stand mixer bowl.While the mixer running, add in water in slow and steady stream.It’s always a good idea to scrape down the side.Knead for 10 minutes or until the gluten develops. When you stretch the dough, if it stretches very thin, it's OK to proceed.
- 〈further steps are apply for both hand and stand mixer〉Add room temperature butter.Knead another 2 to 3 minutes until the dough comes back together.
- Grease the bowl with a couple of drops of vegetable oil or oil spray.Shape your dough into a bowl and cover with a plastic wrap.Let it rise at the warm spot for 45 ~ 50 minutes until the dough double in bulk.
Cookie crust
- While proofing the dough, let's make cookie crust.Cream the butter, add in sugar in 2 to 3 stages and mix to combine.(Sugar looks too much for the butter, but it's perfect ratio.)Add in beaten egg in 3 stages and mix well each time.Add aroma with dark Rum or vanilla.Shift your cake flour into the butter mixture.Fold in the flour. Do not overmix.Wrap in a plastic and keep in the fridge until used.
Assemble
- If you poke the dough with a dusted finger, and it doesn't spring back, it is proofed enough. Take out the dough on the dusted working surface and divide into 10.Shape into a ball, cover with the plastic wrap to prevent drying out. Let them relax for 10 mins.This is called bench time or bench rest.Bench rest makes it easy to shape into a final shape.After 10 mins, take out the rested dough, shape into a ball.
- While bench rest, Take out the cookie crust and shape into a log. Divide into 10 and shape into balls.
- flatten a cookie crust. Take one dough and shape into a ball. Stretch the surface and pinch the bottom. Put together the cookie crust and the dough.
- Dust the cookie crust with granulated sugar, and score the surface a criss-cross.Line the bread on a baking tray and cover with dump towel.Leave it at a warm spot for 30 to 40 mins until almost double in volume.
- Preheat the oven for 170 ℃(340℉) while the second proofing.
- Bake the dough 10 mins, rotate, bake 5 more mins.
Chocolate chip version
- Flatten the cookie crust and put a table spoon of chocolate chips. Put it on the bread dough and do the same as plain version.
